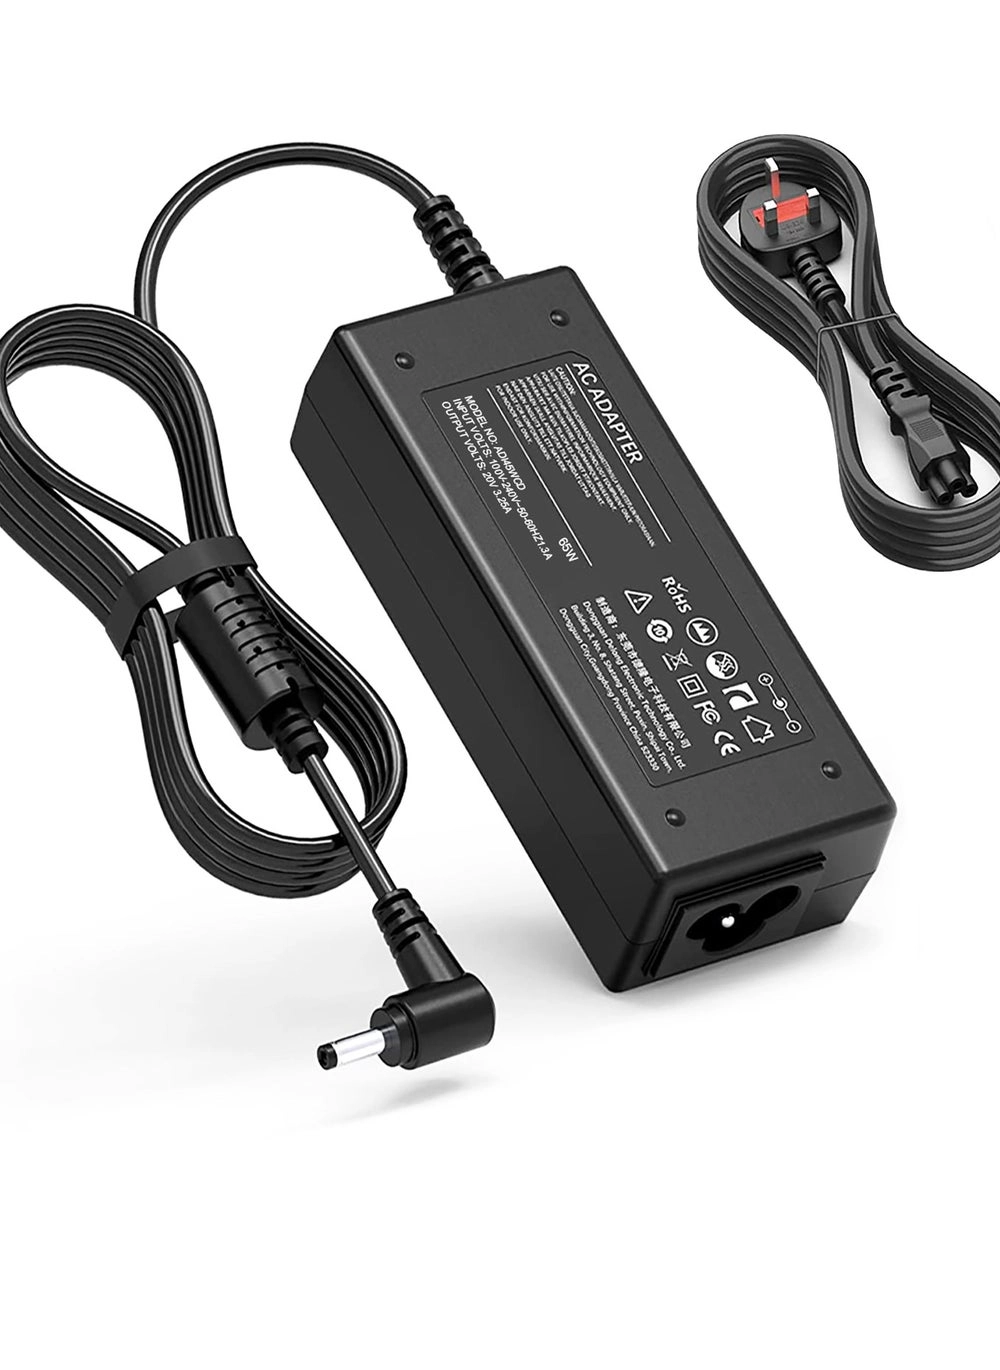
How to Upgrade Your Graphics Card: A Step-by-Step Guide

Section 1: Understanding Graphics Cards

Graphics cards are essential components in any modern computer system, especially for gamers, video editors, and graphic designers. They are responsible for rendering high-quality images, videos, and animations on your monitor. If you’re looking to upgrade your graphics card, it’s important to understand some key aspects before making a purchase.

1. GPU (Graphics Processing Unit): The GPU is the main chip on the graphics card that carries out the complex calculations required for rendering graphics. It determines the overall performance of the card.

2. VRAM (Video Random Access Memory): VRAM is the dedicated memory on the graphics card that stores and quickly accesses data related to the graphics processing. The more VRAM a card has, the better it can handle high-resolution textures and complex scenes.

3. Interface and Compatibility: Graphics cards connect to your computer’s motherboard through various interfaces, such as PCI Express (PCIe). It’s crucial to ensure compatibility between your motherboard’s interface and the graphics card you plan to purchase.

4. Power Requirements: Upgrading to a more powerful graphics card may require an upgrade to your power supply unit (PSU) as well. Check the power requirements of your chosen card and make sure your PSU can handle it.

5. Performance and Cooling: Look for benchmarks and reviews to evaluate the performance of different graphics cards. Consider factors like clock speed, number of cores, and cooling solutions to find a card that meets your needs.

6. Form Factor: Graphics cards come in different sizes, so make sure your computer case has enough space to accommodate the card you’re eyeing. Some cards may require additional cooling solutions or take up multiple slots.

7. Budget: Set a budget for your graphics card upgrade and consider the best options within that range. Higher-end cards tend to offer better performance but come at a higher cost. Determine the balance between your needs and available funds.

Understanding these key aspects will help you make an informed decision when upgrading your graphics card. In the next section, we will guide you through the step-by-step process of installing a new graphics card in your computer.

Section 2: Assessing Compatibility and Requirements

Before upgrading your graphics card, it is crucial to assess the compatibility and requirements to ensure a successful installation. Here are the key factors to consider:

  • Power Supply: Check if your power supply unit (PSU) can handle the increased power demands of the new graphics card. Look for the PSU’s wattage rating and ensure it meets the recommended minimum for the card you plan to install.
  • Physical Space: Measure the dimensions inside your computer case to determine if the new graphics card will fit. Some high-end cards can be quite large and may require additional clearance. Also, check if there are any obstructions such as cables or other components that may hinder installation.
  • Interface Compatibility: Identify the type of interface your motherboard has for connecting the graphics card. The most common interface is the PCIe (Peripheral Component Interconnect Express). Ensure that your motherboard has an available PCIe slot that matches the version supported by the new graphics card (e.g., PCIe 3.0 or PCIe 4.0).
  • Driver Support: Research the graphics card manufacturer’s website to confirm driver support for your operating system. Check if there are any specific driver requirements or updates needed for the new card to function optimally.
  • Performance Expectations: Determine your desired level of performance and the purpose of the graphics card upgrade. If you are a casual gamer or use your computer for basic tasks, a mid-range card may suffice. However, for demanding gaming or professional applications, a high-end card may be necessary.

Assessing compatibility and requirements is crucial to avoid compatibility issues, performance bottlenecks, or potential damage to your computer. Once you have confirmed compatibility, you can proceed with confidence to the next step of the upgrade process.

Section 3: Preparing Your System for the Upgrade

Before diving into the process of upgrading your graphics card, it’s crucial to prepare your system adequately. This section will guide you through the necessary steps to ensure a smooth transition and optimize performance. Follow these guidelines to get your system ready for the upgrade:

  • Research compatibility: Start by researching the compatibility of your new graphics card with your current system. Check the manufacturer’s website or user manual for information on system requirements and compatibility.
  • Check power supply: Upgrading your graphics card may require more power than your current setup can provide. Verify that your power supply unit (PSU) has enough wattage and the necessary power connectors for the new card. If needed, consider upgrading your PSU to avoid any power-related issues.
  • Remove old drivers: It’s crucial to remove the existing graphics card drivers to prevent conflicts with the new card. Uninstall the drivers using the manufacturer’s uninstallation tool or through the Control Panel’s “Programs and Features” section.
  • Update operating system: Ensure that your operating system is up to date with the latest patches and updates. This step helps improve system stability and compatibility with the new graphics card.
  • Prepare workspace: Clear a suitable workspace and gather the necessary tools, including a screwdriver, antistatic wrist strap, and thermal paste (if required). Work in a well-lit, static-free area to avoid any potential damage to your hardware.
  • Backup important data: Although upgrading your graphics card should not affect your data, it’s always wise to back up any critical files or documents before proceeding. This precautionary step can save you from potential data loss or corruption.
  • Consult the user manual: Finally, familiarize yourself with the user manual or installation guide provided with your new graphics card. This resource will contain specific instructions and guidelines from the manufacturer, ensuring a successful installation process.

By following these preparatory steps, you’ll be well-equipped to upgrade your graphics card smoothly and efficiently. Take your time to complete each step, ensuring attention to detail for a seamless transition to enhanced graphics performance.

Section 4: Installing the New Graphics Card

Now that you have chosen the perfect graphics card for your needs, it’s time to install it into your computer. Follow these step-by-step instructions to ensure a successful upgrade:

  1. Turn off your computer and unplug it from the power source. Safety should always come first during any hardware installation.
  2. Remove the side panel of your computer case. This will give you access to the internal components of your computer.
  3. Locate the PCIe slot on your motherboard. Most modern graphics cards use a PCIe slot, which is shorter and wider than other expansion slots.
  4. Remove any covers or brackets that may be blocking the PCIe slot. These are usually held in place by screws or clips.
  5. Align the graphics card with the PCIe slot and gently insert it. Make sure the gold contacts on the bottom of the card are properly inserted into the slot.
  6. Secure the graphics card by screwing it into place. Most graphics cards require at least one screw to hold it firmly in position.
  7. Connect the power cables from your power supply to the graphics card. Many high-performance graphics cards require additional power connectors.
  8. Replace the side panel of your computer case and reconnect any cables that you may have disconnected earlier.
  9. Power on your computer and install the necessary drivers for your new graphics card. You can download the latest drivers from the manufacturer’s website.
  10. Once the drivers are installed, restart your computer to ensure that the new graphics card is functioning correctly.

By following these steps, you should be able to successfully install your new graphics card and enjoy improved graphics performance in your favorite games and applications. Remember to always handle your hardware with care and consult the manufacturer’s instructions if you encounter any difficulties during the installation process.

Section 5: Configuring and Testing the Upgrade

Once you have successfully installed your new graphics card, it is important to configure and test it to ensure optimal performance. Here are the steps to follow:

  • Step 1: Install the Latest Drivers: Visit the manufacturer’s website for your new graphics card and download the latest drivers. Install them on your computer to ensure compatibility and access to all the features and improvements.
  • Step 2: Adjust Display Settings: Open the graphics card control panel, which can usually be accessed by right-clicking on the desktop and selecting the appropriate option. From there, you can customize various display settings such as resolution, refresh rate, and color depth to suit your preferences.
  • Step 3: Test Graphics Performance: Run some benchmarking software or visually demanding applications to test the performance of your new graphics card. This will help you determine if everything is functioning as expected and if any further adjustments are needed.
  • Step 4: Monitor Temperatures: Keep an eye on the temperatures of your graphics card during operation. High temperatures can lead to performance issues or even damage the card. Consider using monitoring software to keep track of the temperatures and adjust fan speeds if necessary.
  • Step 5: Troubleshooting: If you experience any issues such as crashes, artifacts, or performance drops, try updating your drivers to the latest version. If the problems persist, consult the manufacturer’s support resources or seek assistance from online forums or communities dedicated to graphics card troubleshooting.

By following these steps, you can ensure that your upgraded graphics card is properly configured and tested for optimal performance. Enjoy an enhanced visual experience in your favorite games and applications!